31 October 2010

Christmas Stamper Stack.

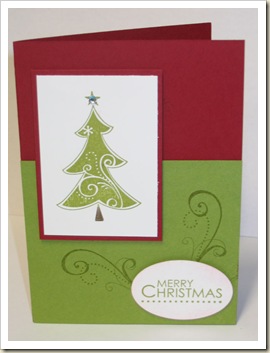
Unfortunately I seem to leave my Christmas creative moments until just before Christmas, so a group of friends decided to come over and attend a stamper stack class so that we could all get a start on our cards for Christmas.


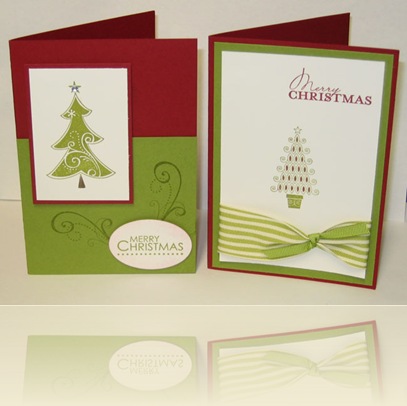
Below are the two cards I created for the class with the new Cherry Cobbler and Old Olive as the main colours.


christmas adjusted


The first card uses the very versatile set Seasons of Joy ( Page 20 in the 2010/2011 Idea Book & Catalogue).  I have also added ‘bling’ on the star.


season joy amended 2

Supplies:
Stamp set: Season of Joy
Card: Cherry Cobbler, Old Olive, Whisper White 
Ink: Old Olive, Cherry Cobbler
Accessories:  Early Expresso Marker, 2” x 1-3/8” (5 x 3.5 cm)Oval Extra Large, Basic Rhinestones,  Dimensonals, SNAIL Adhesive


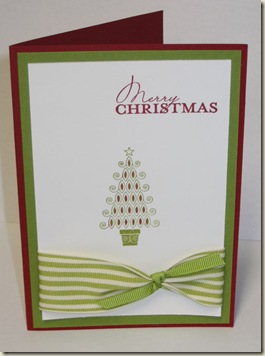
The second card uses the lovely Contempo Christmas set (page 23 in the 2010/2011 Idea Book & Catalogue).


I have stamped the tree in Old Olive and then coloured in the main part of the tree with the Cherry Cobbler marker – remember when you use this little trick do not forget to ‘huff’ before you stamp!


I did not think I would use the  new 1-1/4” (3.2 cm) Striped Grosgrain Ribbons but they  just adds a little more to the card.


contempo christmas adjusted

Supplies:

Stamp set: Contempo Christmas
Card: Cherry Cobbler, Old Olive, Whisper White 

Ink: Old Olive, Cherry Cobbler
Accessories: Old Olive Marker,1-1/4” (3.2cm) Old Olive Striped Grosgrain Ribbon, 1/4” (6.4 mm) Old Olive Grosgrain Ribbon,  Dimensonals, SNAIL Adhesive


If you haven’t started your cards for Christmas, come join us at our next stamper stack class on Sunday 14th November – confirm your place by either giving me a call or send me an email.


Until next time  ---- Meg
24 October 2010

Sketch Challenge


I have been browsing and found a few sketch and colour challenge websites/blogs.


One of the sites is Karin Giron’s Blog called The Sweetest Thing and each Sunday a new sketch challenge is posted.


Another web site called Skipping Stone Design, post challenges weekly on a Tuesday.


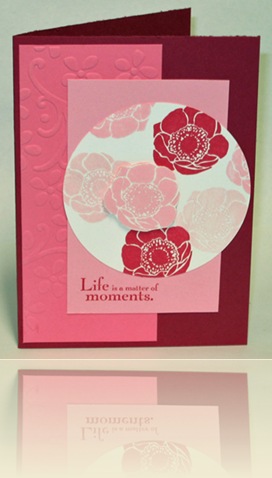
Last week Skipping Stone Design worked with The Sweetest Thing’s Sweet Sunday Sketch #73 and you could either create a card using the sketch or make a ‘pink’ themed card for Breast Cancer Awareness week.


I like the layout and I like the ‘pink’ theme so below is the card that I had fun creating.


challenge 002a_edited-1

Supplies:
Stamp sets: Friends Never Fade, Elements of Style
Card: Rose Red, Pretty in Pink, Pink Pirouette, Whisper White 
Ink: Rose Red, Pretty in Pink, Pink Pirouette
Accessories:  Elegant Bouquet Embossing Folder, Circle Scissor Plus, Dimensionals, SNAIL Adhesive


Thanks for stopping bye – keep creating …………… Meg

18 October 2010

Christmas Bundle Promotion


Christmas Promotion


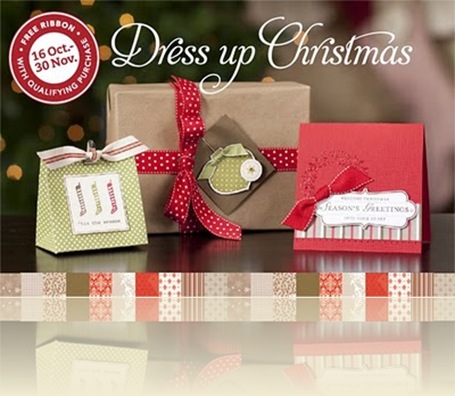
From 16 October until 30 November 2010, Stampin’Up! have a ribbon promotion and there are two ways you can receive these ribbons:


  • Purchase a gift-giving bundle and receive one FREE spool of ribbon.
  • Host a $550 workshop and receive a FREE spool of ribbon.


Gift Bundles are:


  1. Gifted Set & Jolly Holiday Designer Series Paper
  2. Welcome Christmas Set & Christmas Cocoa Speciality Designer Series Paper
  3. Season of Joy Set & So Swirly Stampin’ Around Wheel
  4. Delightful Decorations Set & Ornament Punch


Click here to see more details including a view of the wonderful ribbons that are on offer.


So don’t delay give me a call or send me an email to place your order.


Regards


Meg

08 October 2010

Greenhouse Gala Trio


When I looked at the Greenhouse Gala DSP, I was not real sure I should purchase it as it seems very bright and not normally my style but it has provide a new challenge and the colours have grown on me.


The Greenhouse Gala DSP can be found on page 125 of the current catalogue and this DSP contains the following colours: Pear Pizzazz, Daffodil Delight, Chocolate Chip, Real Red, Pumpkin Pie and Baja Breeze.


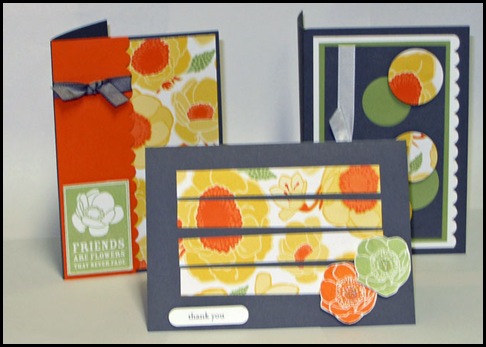
Some of the colours found in the DSP provide me with inspirations for the following three cards.


Greenhouse Gala trio


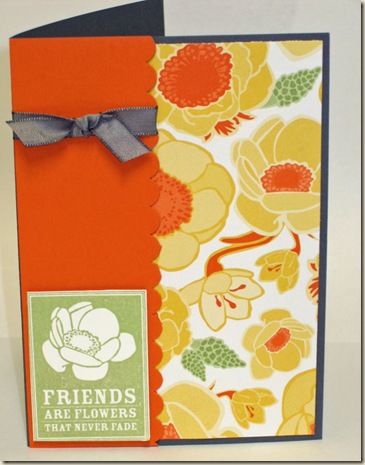
The first card I create used a large sample of the DSP and a some of the lovely pumpkin pie cardstock.  This card should make any friend feel bright :)


Greenhouse Gala print


Supplies:
Stamp sets: Friends Never Fade
Card: Basic Grey, Whisper White 
Ink: Pear Pizzazz
Accessories:  Greenhouse Gala DSP, Scallop Edge Border Punch,  Dimensionals, Basic Grey Taffeta Ribbon (Retired), SNAIL Adhesive


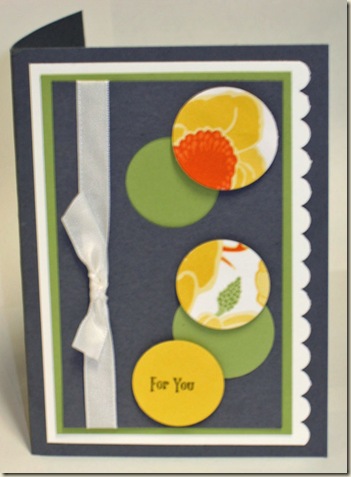
You know how sometimes things just fall together, well this is what basically happened with this card.


I punched out some circles from DSP paper and placed them on the card and the result is below.


Greenhouse Gala circle


Supplies:
Stamp sets: Friends Never Fade, Vintage Labels
Card: Basic Grey, Whisper White, Pear Pizzazz, Daffodil Delight
Ink: Basic Grey
Accessories:  Greenhouse Gala DSP, Scallop Edge Border Punch,  Dimensionals, SNAIL Adhesive, Whisper White 3/8” (1cm) Taffeta Ribbon,
1-3/8” (3.5 cm) Circle Large Punch,
1-1/4” (3.2 cm) Circle Large Punch


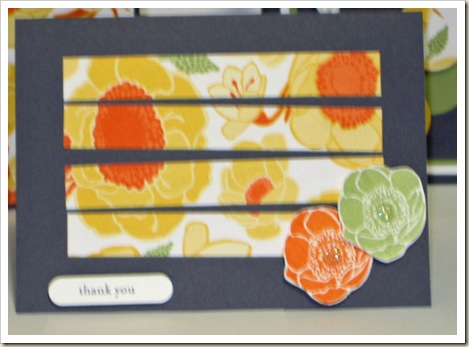
It was late at night when I finished the last card and I wondered what effect I would get if I cut the DSP and sort of layered it with a little space in between. 


I also stamped and cut out  flowers from the Friends Never Fade set (on page 71 of the current catalogue) and added a touch of Dazzling Diamonds in the centre of each flower.


I like the end result - another bright happy card to give someone.


Greenhouse Gala split

 Supplies:
Stamp sets: Friends Never Fade, Teeny Tiny Sentiments 
Card: Basic Grey, Whisper White,

Ink: Basic Grey, Pumpkin Pie, Pear Pizzazz
Accessories:  Greenhouse Gala DSP,  Dimensionals, SNAIL Adhesive, Word Window Punch, Dazzling Diamonds, Multipurpose Liquid Glue


Thanks for stopping by and visiting, please leave a comment if you feel like it.


Until next time, keep creating – Meg

06 October 2010

Newsprint DSP with a touch of love…

One of the new Designer Series Paper (DSP) in the new catalogue is the called Newsprint and there are many ways this paper could be used for cards or scrapbooking.


The DSP is printed on a Very Vanilla base with Basic Black print and can be seen on page 127 of the current catalogue.


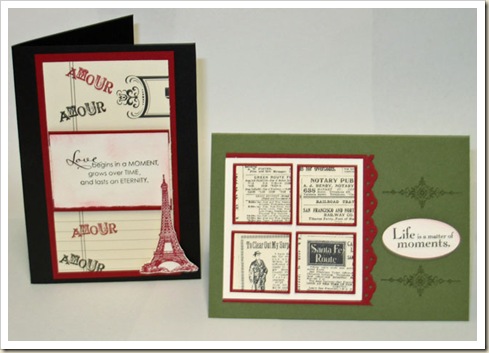
I created the two cards below and using images from Artistic Etchings, Elements of Style & Occasional Quotes stamp sets.


newsprint double


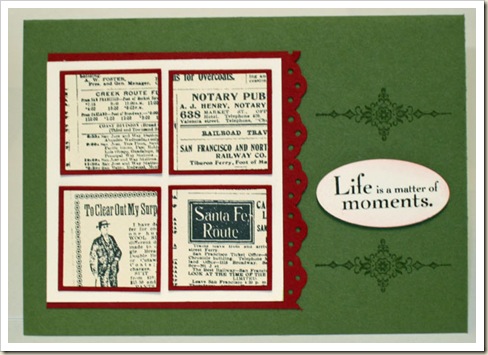
The first card I created used the new cherry cobbler – isn’t it a wonderful rich colour.  I also used the saying from the Elements of Style stamp set. 


newsprint square

Supplies:
Stamp sets: Artistic Etchings, Elements of Style
Card: Always Artichoke, Cherry Cobbler, Very Vanilla
Ink: Basic Black , Always Artichoke
Accessories:  Newsprint DSP, 1-3/8” (3.5 cm) Square Extra Large Punch, 1-1/4” (3.2 cm) Square Large Punch,  Eyelet Border Punch,  SNAIL Adhesive, 2” x 1-3/8” (3.5 x 1.6 cm) Oval Large Punch, , Dimensionals, Sponge Daubers


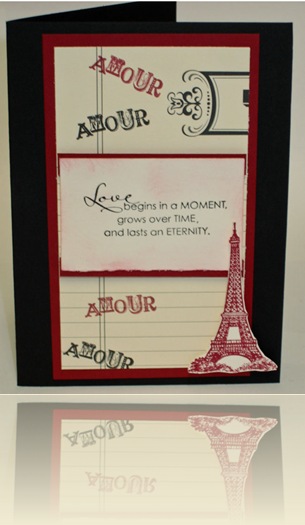
The second card used a portion of the Newsprint DSP and had a focus on love. 


newsprint amour

Supplies:
Stamp sets: Artistic Etchings, Occasional Quotes (Hostess)
Card: Basic Black, Cherry Cobbler, Very Vanilla
Ink: Basic Black , Cherry Cobbler
Accessories:  Newsprint DSP, SNAIL Adhesive, Dimensionals, Sponge Daubers


I am happy with both cards – what do you think?  If I have inspired you to create something new then that is good.


Remember if have any questions or wish to place an order you can either call or email me.


Until next time…. Meg

Wedding invitations

Hi everyone, sorry for not posting earlier things have been very busy.


The wedding invitations as mentioned in my previous post, have been completing for a friend and posted.


These invitations are the second lot of wedding invitations I have completed this year and I am really enjoying creating invites.


The first invites I created were for a wedding in March this year and my little girl was a flower girl. She looked beautiful and I was very proud of her.


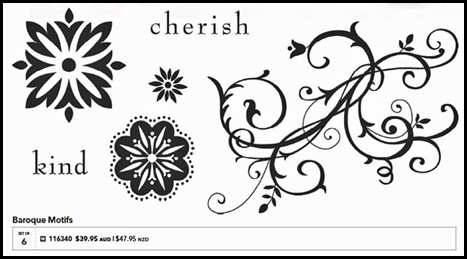
The bride had requested a theme of black, red and white and we finally found a design that she like and it was using one of my favourite stamp sets – Baroque Motifs. 


This was one of the first sets I brought and I have used this set so many times. 


If you are not sure of the set it appears on page 100 of the current catalogue and it is pictured below.


baroque motifs


I also used a number of the swirls from the Priceless set – this set is on page 90 of the current catalogue.


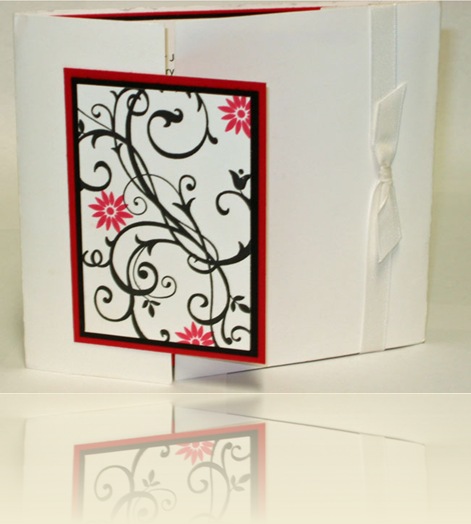
A picture of the front of the card is below and when you opened the wedding invitations, the main details of the card were in the centre of the layout and there was a pocket on the right hand side of the card were the Wishing Well and RSVP cards were kept.


The menu and table cards were also created in Black, Red and White and I stamped the swirl from the Priceless set on the these items.


The ribbon crossed over the front and the inside pocket of the card.


first invite


Supplies:
Stamp sets: Priceless & Baroque Motifs
Card: Real Red, Basic Black and Whisper White
Ink: Basic Black and Real Red
Accessories: Whisper White 3/8” Taffeta Ribbon,  SNAIL Adhesive


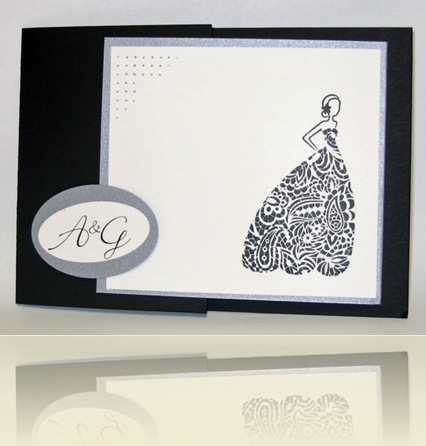
The second invitations were created using a set I liked from the moment I saw it - For the Bride. 


Unfortunately this set has retired but I have posted these invites as they may provide you with inspiration to create something similar.


The Bride on this occasion was not sure what she wanted in regards to a colour theme and in the end we settled on Black, White and Grey.


The front of the card was very simple with the bride stamp being the main image with a little paper piercing in the corner.


 bride invite

Supplies:
Stamp sets: For the Bride (retired)
Card: Basic Black, Whisper White and non-SU metallic grey cardstock
Ink: Basic Black
Accessories:  1-3/4” x 7/8” (4.4 x 2.2 cm) Oval Large Punch, 2” x 1-3/8” (5 x 3.5 cm)  Oval Large Punch,  SNAIL Adhesive, Dimensionals. Mat Pack, Paper-Piercing Tool, Bone Folder, Whisper White envelopes


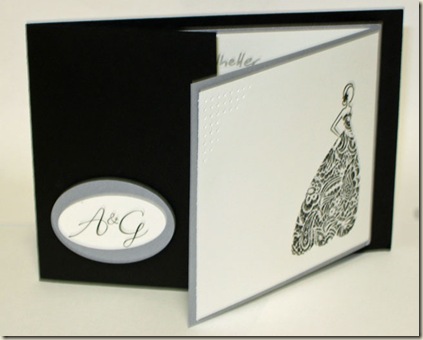
The initials of the bride and groom were printed and punched out.  Two dimensionals were placed on one side of the punched ovals so that the card was held close by tucking the bride image under the initials.  This can be seen in the picture below.


bride invite open


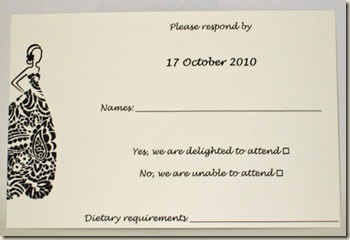
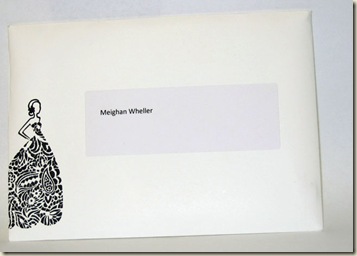
The bride image was stamped on each RSVP and the envelope as per the images below.


bride rsvp   bride envelope


I am in the process of completing the table menus and place cards for this wedding.


The brides were happy with the invites and isn’t that the main aim! :)


I have found sometime over the past few days to create a few new cards from the new catalogue and I will post them over the next few days.


Thanks for stopping by!


Till next time - Meg